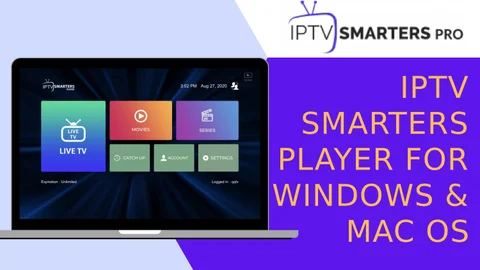
How To Setup IPTV On Windows And MacOS

In recent years, the popularity of Internet Protocol Television (IPTV) has surged dramatically. IPTV offers an innovative way to access television programming via the internet, providing users with a wide range of channels and on-demand content. While IPTV is commonly associated with set-top boxes and smart TVs, setting it up on your Windows or MacOS device opens up a world of entertainment right at your fingertips. In this guide, we’ll walk you through the steps to set up IPTV on both Windows and MacOS platforms.
Understanding IPTV:
Before diving into the setup process, it’s essential to understand what IPTV is and how it works. Unlike traditional television broadcasting methods, which rely on cable or satellite signals, IPTV delivers television content over the internet. This allows users to stream live TV channels, on-demand movies, TV shows, and even catch-up TV services directly to their devices.
Setting Up IPTV on Windows:
Windows users have several options for setting up IPTV on their devices. One of the most popular methods involves using dedicated IPTV player software. Here’s how to do it:
- Choose an IPTV Player: There are several IPTV player applications available for Windows, such as VLC Media Player, Kodi, and Perfect Player. Download and install the player of your choice from their respective websites.
- Obtain an IPTV Subscription: To access IPTV channels, you’ll need a subscription from a reliable IPTV service provider, We recommend iptv4k-plus.com they have the best service ever ! Once you’ve subscribed, they will provide you with the necessary credentials, including a username, password, and URL to access the IPTV service.
- Configure the IPTV Player: Open your chosen IPTV player and navigate to the settings or preferences menu. Look for an option to add a new playlist or source. Enter the provided URL, username, and password from your IPTV service provider.
- Enjoy Your Channels: Once you’ve added the playlist, you should see a list of available channels within the IPTV player. Simply select the channel you want to watch, and it should start streaming instantly.
Setting Up IPTV on MacOS:
Mac users can also enjoy IPTV content on their devices with relative ease. Here’s how to set it up:
- Install an IPTV Player: Similar to Windows, MacOS users can choose from various IPTV player applications. VLC Media Player and Kodi are popular choices that are compatible with MacOS. Download and install the preferred player from their official websites.
- Subscribe to an IPTV Service: As with Windows, you’ll need to subscribe to an IPTV service provider to access channels. Ensure you choose a reputable provider with a wide selection of channels and reliable service.
- Configure the IPTV Player: Open the IPTV player application on your MacOS device. Navigate to the settings or preferences menu and look for an option to add a new playlist or source. Enter the URL, username, and password provided by your IPTV service provider.
- Start Streaming: Once you’ve added the playlist, you should see the list of available channels within the IPTV player. Select your desired channel, and it should start streaming immediately.
Tips for a Smooth Experience:
- Internet Connection: To enjoy uninterrupted IPTV streaming, ensure you have a stable and high-speed internet connection.
- VPN: Consider using a Virtual Private Network (VPN) for added security and privacy while streaming IPTV content.
- Update Software: Regularly update your IPTV player software to access new features and improvements.
- Explore Add-Ons: Many IPTV players offer add-ons and plugins that enhance the viewing experience. Explore these options to customize your setup further.
In conclusion, setting up IPTV on both Windows and MacOS devices is a straightforward process that opens up a world of entertainment possibilities. Whether you’re a sports enthusiast, movie buff, or just looking for an alternative to traditional television, IPTV provides a convenient and flexible solution. By following the steps outlined in this guide and considering the tips provided, you’ll be enjoying your favorite channels in no time. Happy streaming!


